How to Prepare Print-Ready Files for Perfect Results Every Time | Complete 2026 Guide
-
July 8, 2026
-
7
How to Prepare Print-Ready Files for Perfect Results Every Time
Whether you’re printing business cards, brochures, flyers, posters, banners, packaging, or promotional materials, the quality of your final product depends heavily on how well your artwork is prepared before it goes to print.
Many printing issues—such as blurry images, incorrect colors, missing text, white borders, or poor alignment—can be avoided simply by submitting a properly prepared print-ready file.
If you’re new to commercial printing or want to ensure professional results, this comprehensive guide will walk you through every step of creating print-ready files that deliver exceptional quality every time.
What Is a Print-Ready File?
A print-ready file is a digital document that has been correctly formatted for professional printing. It contains all the necessary specifications required by commercial printers, including:
- Correct dimensions
- High-resolution images
- CMYK color mode
- Bleed and trim marks
- Embedded or outlined fonts
- Proper margins
- Compatible file format
A print-ready file allows printers to reproduce your design exactly as intended without unexpected errors or delays.
Why Preparing Print-Ready Files Matters
Submitting an improperly prepared file can lead to:
- Blurry images
- Cropped text
- Incorrect colors
- White edges around the design
- Missing fonts
- Poor print quality
- Production delays
- Additional setup costs
Taking a little extra time during file preparation ensures your printed materials look polished, professional, and consistent with your brand.
Step 1: Set the Correct Document Size
Always design your artwork using the final trim size of the printed product.
For example:
| Product | Standard Size |
|---|---|
| Business Card | 85 × 55 mm |
| A6 Flyer | 105 × 148 mm |
| A5 Flyer | 148 × 210 mm |
| A4 Brochure | 210 × 297 mm |
| DL Flyer | 99 × 210 mm |
| Poster A3 | 297 × 420 mm |
Starting with the correct dimensions prevents scaling issues later in the printing process.
Step 2: Add Bleed to Your Design
Bleed is the extra area extending beyond the finished trim edge.
Printers trim printed sheets after production, and slight movement during trimming is normal. Without bleed, tiny white borders may appear around the edges.
Most commercial printers recommend:
- 3 mm bleed (UK & Europe)
- 0.125 inch bleed (USA)
For example:
An A4 flyer should be designed as:
- Finished size: 210 × 297 mm
- With bleed: 216 × 303 mm
Ensure that background colors, images, and patterns extend into the bleed area.
Step 3: Keep Important Content Inside the Safe Area
The safe area is the margin inside the trim line where essential content should remain.
Keep the following at least 5 mm away from the trim edge:
- Logos
- Text
- Contact details
- QR codes
- Icons
- Important graphics
This prevents important information from being accidentally trimmed.
Step 4: Use High-Resolution Images
Image resolution has a significant impact on print quality.
For professional printing:
- Minimum resolution: 300 DPI (Dots Per Inch)
Avoid using:
- Screenshots
- Social media images
- Low-resolution web graphics
- Compressed JPEG files
Low-quality images often appear:
- Blurry
- Pixelated
- Soft
- Unprofessional
Always use original, high-resolution files whenever possible.
Step 5: Design in CMYK Color Mode
One of the most common printing mistakes is submitting artwork in RGB instead of CMYK.
RGB
Used for:
- Websites
- Mobile devices
- Digital displays
CMYK
Used for:
- Commercial printing
- Brochures
- Packaging
- Flyers
- Business cards
If you design in RGB, printed colors may appear dull or different from what you see on your monitor.
Whenever possible, create your artwork in CMYK from the beginning.
Step 6: Choose the Right File Format
Professional printers generally prefer:
The industry standard because it:
- Preserves layout
- Embeds fonts
- Maintains image quality
- Supports bleed
- Works across all operating systems
Other Accepted Formats
Some printers also accept:
- AI (Adobe Illustrator)
- EPS
- TIFF
- PSD (flattened when required)
Avoid submitting:
- Microsoft Word files
- PowerPoint files
- Screenshots
- Canva exports without bleed
- Low-quality JPEG images
Always check your printer’s preferred file format.
Step 7: Embed or Outline Fonts
Missing fonts can completely alter your design.
To prevent this:
- Embed fonts in your PDF, or
- Convert fonts to outlines before exporting
This ensures your typography appears exactly as designed, even if the printer doesn’t have the same fonts installed.
Step 8: Check Image Placement
Images should:
- Extend into the bleed area
- Be high resolution
- Not be stretched
- Maintain correct proportions
Avoid enlarging small images excessively, as this reduces print quality.
Step 9: Verify Color Consistency
If your brand uses specific colors, consistency is essential.
For critical branding projects:
- Use Pantone (PMS) colors when required
- Check CMYK values
- Avoid mixing multiple color profiles
Request a printed proof if color accuracy is especially important.
Step 10: Flatten Transparency (When Needed)
Some older printing systems may struggle with live transparency effects.
Flattening transparency helps avoid:
- Unexpected white boxes
- Missing shadows
- Layering issues
- Printing artifacts
Modern PDF/X standards often handle transparency well, but consult your printer if you’re unsure.
Step 11: Include Crop Marks (If Requested)
Crop marks indicate where the printed sheet should be trimmed.
Many commercial printers prefer:
- Crop marks
- Bleed
- Registration marks (when necessary)
However, some print providers add these automatically. Always review their artwork guidelines before exporting.
Step 12: Proofread Everything Carefully
Before sending your file to print, double-check:
- Spelling
- Grammar
- Phone numbers
- Email addresses
- Website URLs
- Pricing
- Dates
- QR codes
- Social media handles
A simple typo can result in costly reprints.
Step 13: Export Using Print-Quality Settings
When exporting your PDF, choose:
- High-quality print preset
- PDF/X-1a or PDF/X-4 (if supported)
- 300 DPI image resolution
- Include bleed
- Embed fonts
- Preserve CMYK color profile
Avoid excessive compression, as it can reduce image quality.
Common Mistakes to Avoid
Even experienced designers occasionally overlook important details. Here are some of the most common mistakes:
- Designing in RGB instead of CMYK
- Forgetting to add bleed
- Placing text too close to the edge
- Using low-resolution images
- Missing fonts
- Incorrect page size
- Exporting at low quality
- Ignoring printer guidelines
- Using screenshots in print designs
- Forgetting to proofread
Avoiding these issues can save both time and money.
Best Software for Creating Print-Ready Files
Professional designers often use:
- Adobe InDesign – Ideal for brochures, magazines, and catalogs
- Adobe Illustrator – Best for logos, flyers, and business cards
- Adobe Photoshop – Perfect for image editing and photo-heavy designs
- CorelDRAW – Popular for signage and commercial printing
- Affinity Designer – A cost-effective alternative for vector graphics
- Canva Pro – Suitable for simple marketing materials, provided you export with bleed and print settings enabled
Choose the software that best matches your project’s complexity and your level of design experience.
Print-Ready File Checklist
Before submitting your artwork, confirm the following:
- Document is the correct size
- Bleed has been added
- Safe margins are respected
- Images are 300 DPI
- Artwork is in CMYK
- Fonts are embedded or outlined
- PDF is exported in high quality
- Crop marks are included if required
- Spelling and contact details are correct
- Images extend into the bleed area
- File matches your printer’s specifications
A final review can prevent costly production issues and ensure your materials are printed exactly as intended.
Tips for Working with Your Print Provider
A reliable print provider is more than just a production partner—they can help you avoid mistakes and achieve the best possible results. Before placing an order:
- Request artwork specifications.
- Ask whether they require PDF/X files.
- Confirm bleed and margin requirements.
- Clarify preferred color profiles.
- Request a digital or printed proof for large or premium projects.
- Discuss finishing options such as lamination, spot UV, foil stamping, or embossing.
Clear communication helps streamline the production process and minimizes the risk of delays or reprints.
Final Thoughts
Preparing a print-ready file is one of the most important steps in any printing project. By following best practices—using the correct document size, adding bleed, designing in CMYK, embedding fonts, and exporting a high-quality PDF—you can ensure your printed materials look professional, vibrant, and error-free.
Whether you’re producing business cards, brochures, packaging, posters, or large-format marketing materials, investing a little extra time in file preparation will help you achieve consistent, high-quality results while avoiding unnecessary costs and production delays.
A well-prepared print-ready file doesn’t just make the printer’s job easier—it ensures your brand is presented with the quality and professionalism your customers expect.
Related posts
The Complete Guide to Professional Printing Services for Businesses in 2026 Updated!!
The Complete Guide to Professional Printing Services for Businesses in 2026 In an increasingly
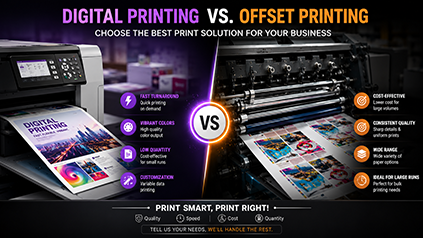
Digital vs. Offset Printing: Which to Choose? A 2026 Guide for Your Businesses today
Digital Printing vs. Offset Printing: Which One Should You Choose? In today’s competitive business

Leave a comment